-
1
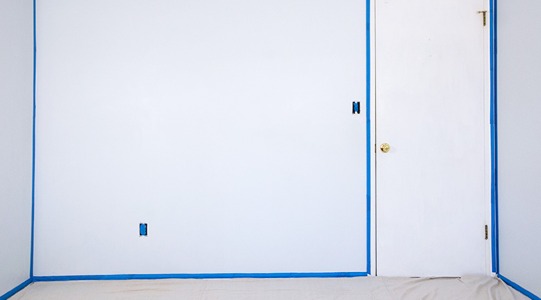
After your wall is clean and dry, remove any hardware like light switch and outlet covers from the wall being painted and use painter's tape to section off the perimeter. Don't forget to tape around the molding of doors if the wall you're painting has one.
Tip: Lay down a drop cloth to keep the floor and baseboards clean.
-
2
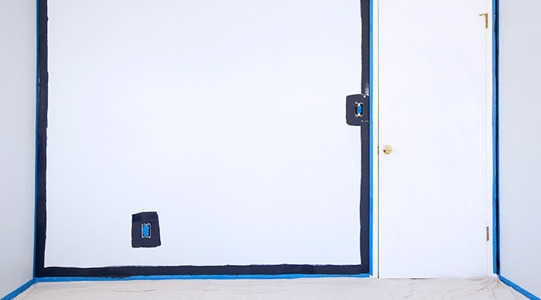
Use a 2" or 2 ½" angled brush and Emerald Interior Acrylic Latex Paint - Flat (Naval SW 6244) to cut in the corners of your accent wall. Then use a 9" roller with a ½" nap to fill in the rest of your wall.
Tip: Rolling in a W shape helps ensure the paint is applied evenly with the best coverage.
-
3
Once the paint has fully dried (about 4-6 hours), pull off the painter's tape at a 45-degree angle.
Tip: Removing painter's tape in a slow and steady motion at a 45-degree angle helps ensure crisp lines.
-
4
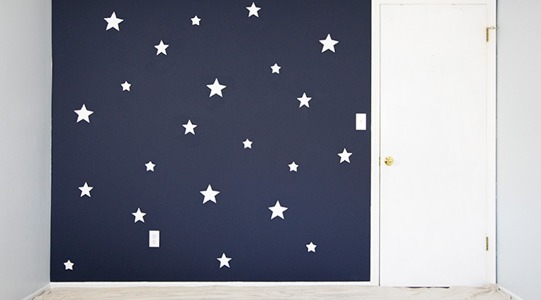
Place your star stencil on the wall and secure all four sides with painter's tape so it doesn't move during paint application.
Tip: We created our own stencils using mylar and made three different star sizes including small, medium and large.
-
5
Dip a sponge brush into Emerald Interior Acrylic Latex Paint – Semi-Gloss (High Reflective White SW 7757) and lightly dab over the stencil making sure all of the star's edges are fully painted. Let the paint dry before repeating the process with a second coat.
Tip: A little goes a long way - lightly dip your sponge brush in paint and dab off any excess paint to keep it from oversaturating the stencil.
-
6
Once your second coat is dry, carefully peel away the stencil. If the edges of your star don't have clean lines, use your angled brush and a little bit of Emerald Interior Acrylic Latex Paint – Flat (Naval SW 6244) to clean up the line.
-
7
Repeat steps 4-6 with the various sizes of your star stencils to create a wall full of stars.
-
8
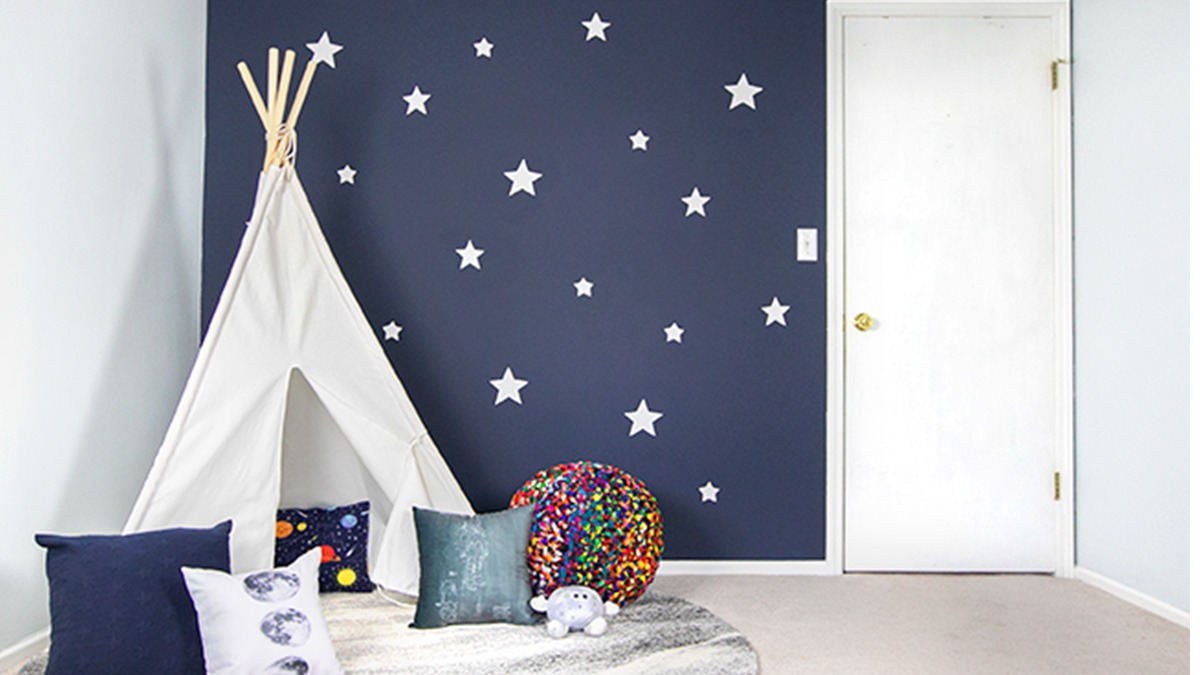
Take a step back and enjoy your night sky accent wall!
-
9
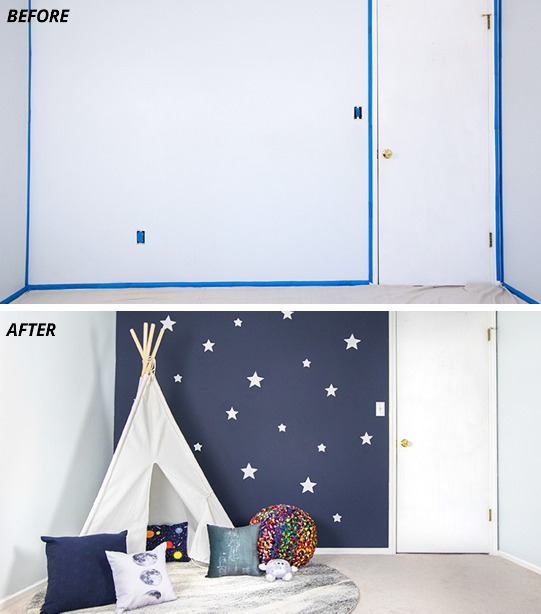
The BEFORE & AFTER...
Close