Close

How to Paint Trim
Supplies Needed:Painter's tape
Sherwin-Williams interior primer such as Premium Wall and Wood Primer
Sherwin-Williams interior latex paint (semi-gloss or high-gloss finish)
One damp sponge
Tack cloth
Sandpaper (120-grit, 100-grit and 80-grit)
Spackle
Spackling or putty knife
Paint trays
Paint sticks
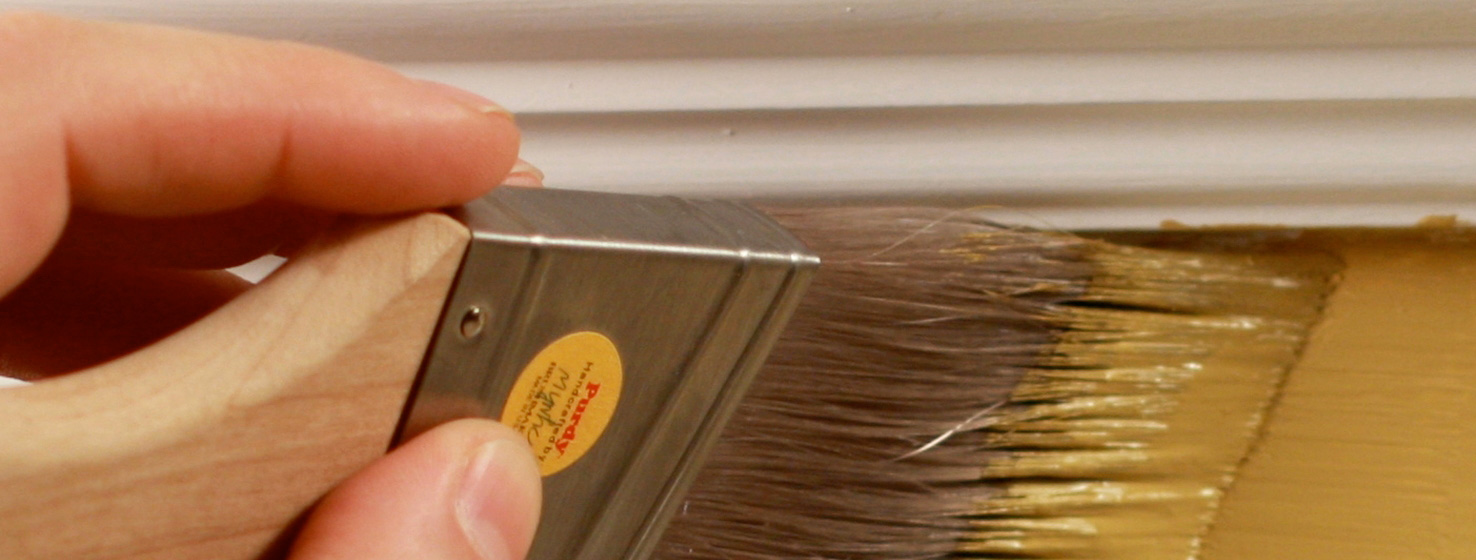
Purdy paint brushes (2-inch angled brushes)
Part 1 - Prepare the Trim
Step 1: Use the damp sponge to clean dirt and grime from trim. If needed, use the rough side of a sponge to ensure a clean starting surface.
Step 2: Sand the surface. After the trim has been sanded, use a damp sponge to wipe away any dust.
Sanding Tip: If the trim is new or already smooth, lightly sand using 120-grit sandpaper until all shine disappears from the trim. If the trim is rough and worn, start by sanding with coarse, 80-grit sandpaper. Then, move to less-coarse sandpaper such as 100- or 120-grit to smooth the surface.
Step 3: Fill in holes, dents and cracks with a lightweight spackling compound. (Follow directions on the spackling container for best results.) When the spackle dries completely, lightly sand the spackled areas using 120-grit sandpaper to smooth out the surface. Use tack cloth to remove any sanding dust from the trim.
Step 4: Dust off walls and ceiling around the trim to ensure painter's tape adheres well. Apply painter's tape to walls and ceilings surrounding the trim, being careful not to stick the tape to the trim itself. To prevent paint from bleeding through the tape, try to use one long piece of tape instead of multiple shorter pieces.
Taping Tip: Select 3-to-4 inches of painter's tape and firmly press it to the wall. While holding this "starting spot” in place, pull out 6 inches of tape, then firmly secure it to the wall. Repeat until the tape is secured for the length of the trim.
Step 5: After you have applied the tape, press the tape's edges with a clean spackling or putty knife to ensure adhesion, as this helps prevent the paint from bleeding through the edges.
Part 2 - Paint the Trim
Step 1: Apply primer to trim, covering any bare wood and spackled areas. Allow primer to dry for 24 hours. After the drying period, if bare wood or spackle is showing, apply another coat of primer to the trim.
Priming Tip: Thoroughly mix the primer with a paint stick and pour a small amount into a paint tray. Dip an angled brush into the primer, covering no more than ½ inch to 1 inch of the brush. Use the side of the tray to wipe excess primer off the brush, helping to avoid drips while priming.
Step 2: After the primer dries, lightly sand the trim using 120-grit sandpaper to eliminate brush strokes or paint drips. Use a damp sponge or tack cloth to remove all sanding dust.
Step 3: Apply paint to the trim using short, horizontal brush strokes. Repeat the motion until a few feet of trim (not the full length) are covered in paint.
Painting Tip: Thoroughly mix the paint with a paint stick and then pour a small amount into a clean paint tray. Dip an angled brush into the paint, covering no more than ½ inch to 1 inch of the brush. Use the side of the tray to wipe excess paint off the brush, helping to avoid drips while painting.
Step 4: Smooth over the series of short brush strokes with one long brush stroke. Do not add more paint to the brush — instead, drag the brush in one long motion over the freshly painted trim. Repeat if necessary, depending on the width of the trim, to create the appearance of long, smooth strokes.
Technique Tip: Wider trim may require three or four long, parallel brush strokes. Thinner trim may only require one or two long, parallel strokes.
Step 5: Start painting the next section of trim following steps three and four. Repeat until trim is fully painted.
Step 6: Before paint dries, carefully pull tape off of the wall.


